


I. Overview
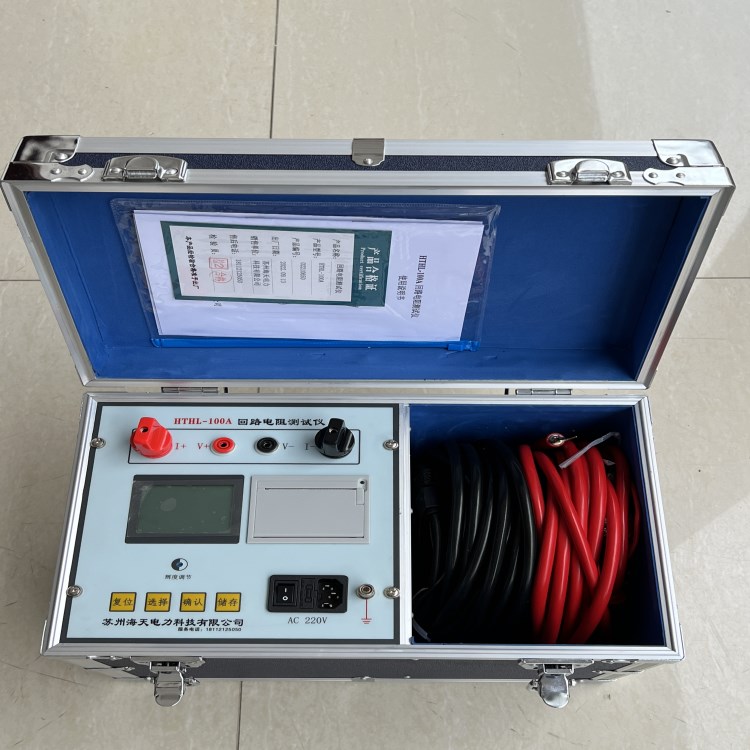
Our company develops and producesThe 100A Series Circuit Resistance Tester employs a 32-bit ARM core as its processing unit, controlling the entire machine to automatically perform self-calibration, current stability judgment, data processing, and resistance value display. It can measure the contact resistance, circuit resistance, and substation busbar resistance of various high-voltage switches and electrical appliances, as well as power line junction resistance.Weld joint contact resistance.The instrument is compact and lightweight, facilitating ease of use for staff.
II. Safety Measures
1、 Please read this manual carefully before using the instrument.
2、 The operator of the instrument should possess general knowledge of the use of electrical equipment or instruments.
3、 This instrument is suitable for both indoor and outdoor use, but it should be avoided in areas prone to rain, corrosive gases, excessive dust, high temperatures, and direct sunlight.
4、 Instruments should be avoided from severe vibrations.
5、 Maintenance, care, and adjustment of the instrument should be performed by professionals.
6、 After testing, turn off the power and then disconnect the test lines.
7、 During testing, movement of the test clamp and power lines is prohibited.
III. Performance Features and Technical Specifications
1. Output Current and Range:
Output Current:100A: Range: 1mW-20mW。
2. Test Accuracy0.5% High Resolution: 0.1mW。
3. 65K true-color LCD display, with Chinese menu prompts for easy operation.
4. Large-capacity storage capability, capable of storing2,000 test records.
5. Work Power Supply: AC220V±10﹪。
6. Operating Temperature: -10℃~50℃。
7. Operating Humidity: Environmental Humidity <90%RH 。
8. Instrument Weight:5㎏。
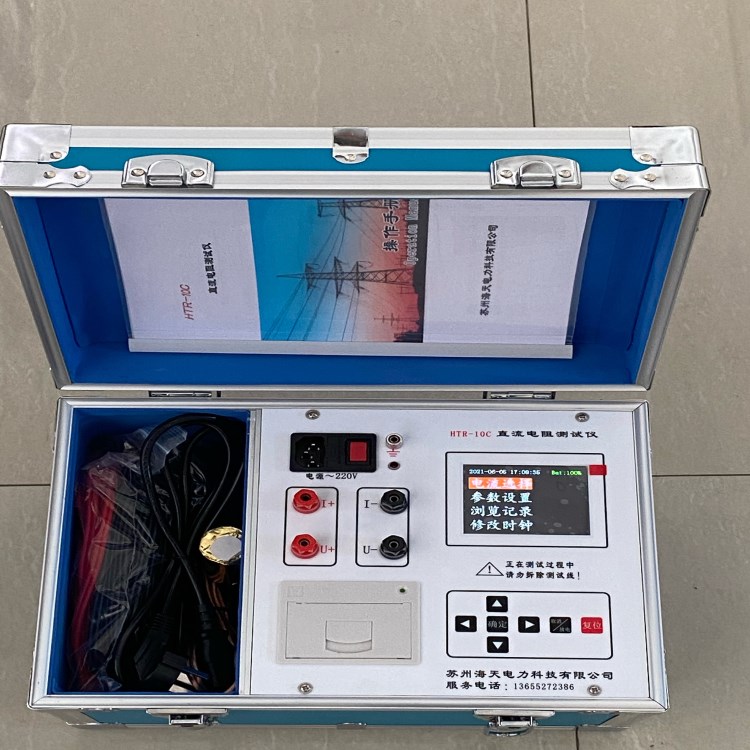
IV. System Introduction
1. AC220 power outlet with built-in switch and fuse box.
2. Grounding Rod: Ground wire terminal.
3. I+ I-: Output current terminals.
4. V+ V-: Sample voltage terminals.
5. “▼”、“4"Toggle selection button,"4Reusability"Save"Features.
6. Confirm Key: Confirm the current selection; in test mode, press the confirm key to print data.
7. Cancel Key: Press this key to return to the previous menu level.
8. Reset Button: Press this button to return the instrument to its initial state after completion of testing or interruption of work.