


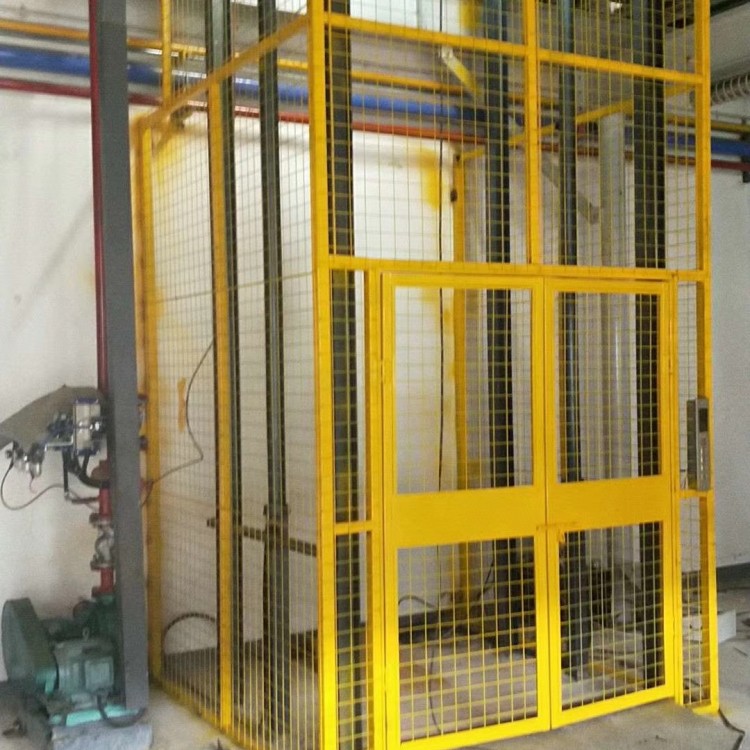


Chimney foundation construction process for new construction
Construction Preparation → Survey and Layout → Excavation → Foundation Excavation Inspection → Casing Layer Construction → Foundation Bottom Plate Reinforcement and Formwork Installation → Reinforcement Concealed Acceptance → Pouring Bottom Plate Concrete → Bottom Plate Demolding and Curing → Ring Wall Reinforcement Fabrication and Tying → Construction Joint Treatment at Bottom Plate and Ring Wall → Ring Wall Formwork Erection → Ring Wall Concrete Pouring → Concrete Curing and Formwork Removal → Foundation Appearance Concealed Acceptance → Excavation Backfilling and Sampling for Inspection → Foundation Section Acceptance.
(1) Survey and Stake Out
a). Setting of central pile: Before earthwork construction, the central point should be marked according to the center coordinates of the chimney. This central point remains temporary. During the pouring of the foundation bottom plate concrete, place a metal plate at the center. After the foundation formwork is removed, use the ground control piles and the "crossing" intersection method to locate the central point onto the metal plate and make a mark. At this point, the central point becomes the central control pile for the chimney.
b). Central Control: Based on the factory layout and the central coordinates of the chimneys, establish semi-permanent control stakes in 90-degree directions, with two points per direction. The selection of control stake locations should consider the impact of any nearby buildings or structures.
(2) Earthwork
a). Excavation and transportation of earthwork are carried out mechanically. Excavated earth is stacked in the reserved site on-site. Manual labor assists in clearing the bottom. A 300mm depth of the base is manually excavated to avoid disturbing the original soil, and over-excavation is strictly prohibited. The slope coefficient for earthwork excavation is 1:0.5. In case of rain, a drainage trench 200mm x 200mm wide and deep is set around the foundation pit bottom, along with a 600mm x 600mm x 600mm sedimentation well to facilitate timely drainage during rainfall.
b). The base surface should be level, and it is strictly prohibited to level the foundation pit bottom by filling with soil. In the case of individual low-lying areas slightly below the standard elevation, use C15 concrete for pouring.
c). Once the base trench is excavated, promptly construct a 200mm thick C15 concrete base layer.
(3) New Construction of Basic Reinforcing Steel
a) Operation Process: Positioning and laying out on the concrete base layer → Binding and reinforcing the bottom plate lower layer → Installing and securing the steel support frame → Binding and reinforcing the top layer of the bottom plate → Binding the ring wall steel → Binding the reserved rebars for the cylinder body and opening.
b) Reinforcement Positioning: After the sub-layer concrete is poured and its strength reaches 2.5 MPa, reposition the chimney center, mark it securely. Cut and process the foundation reinforcement according to the approved layout drawings, label and number them, and transport them to the site for tying. First, place the bottom plate radial reinforcement, then insert the bottom plate hoop reinforcement, ensuring accurate spacing. Use tied connections for reinforcement joints; if local joints are misaligned and do not meet specifications, or for short reinforcement at the ends of hoop bars, use single-sided lap welding. Welding length is 10d. The upper layer of the bottom plate reinforcement is supported on reinforcement supports, which are assembled and welded on the ground. After welding the reinforcement supports, weld the vertical bars of every two adjacent supports with a Φ16 steel bar to form an X-shaped bracing. Start tying the upper layer of the bottom plate reinforcement after installing the supports, then tie the remaining foundation reinforcement. Use lap-tied joints for reinforcement connections, and follow the drawings for construction. The drawings do not specify that the anchoring length of the reinforcement should be 45d. When using tied joints, the spacing of joints within the same plane should not exceed 25%. When using welding or mechanical connections, this should not exceed 50% as per GB50078-2008 specifications.
c) Field personnel are prohibited from entering the space between the double-layer reinforcing bars of the foundation for construction work.
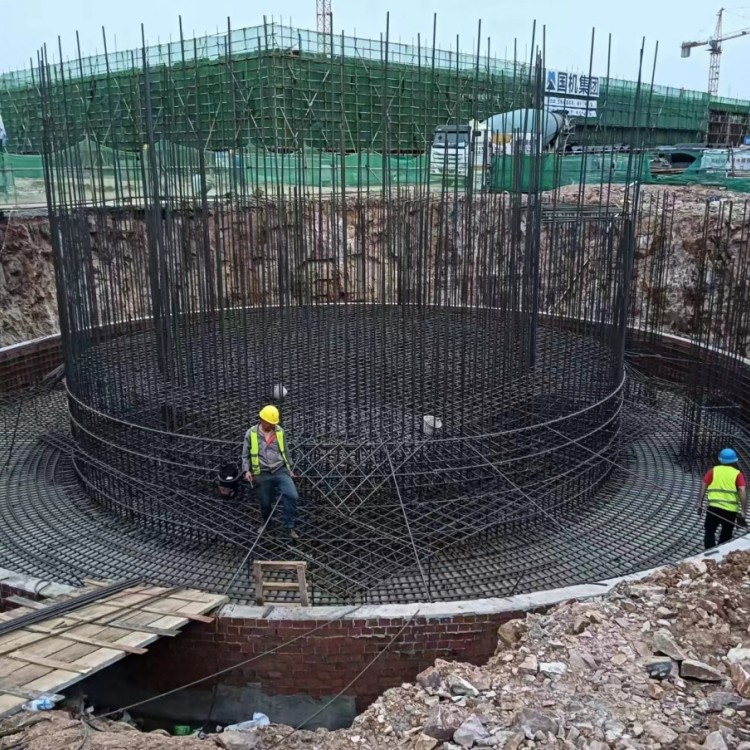
(4) Basic Template New Project
A 7.06m diameter template line mold is popped up on the sub-layer surface, using either P3006 steel molds or wooden molds. Then, a φ18 rebar is bent into a hoop according to the outer arc of the base slab mold, with a total of 3 hoops to ensure the outer mold does not shift or expand. The outer side of the template uses φ48×3.5 steel pipes, supported on the soil pit slope, to ensure the template does not displace or deform during concrete pouring. The outer ring wall template is made of 18mm thick multi-layer board, with 50×70 wooden planks used for reinforcement at 300mm intervals. The inner template uses P2015 steel molds, which are reinforced with steel pipe hoops, evenly arranged in 3 hoops around the outer perimeter, with φ18 rebar bent into a hoop to form 5 hoops evenly distributed.
(5) Basic Concrete Construction
a). Concrete product suppliers must rigorously inspect the quality of raw materials and provide material test reports; use of substandard materials is strictly prohibited.
b). Prior to the formal use of admixtures in concrete, the concrete supplier must conduct tests to ensure that the admixtures do not affect construction quality.
c). Concrete suppliers organize trial mixing in accordance with the construction site requirements, and the mix ratio can only be determined after passing the tests.
d). Concrete suppliers must strictly mix concrete according to the mix ratio and regularly check the accuracy of the measuring equipment.
e). Prior to concrete pouring, the concrete supplier must provide the "Ready-Mixed Concrete Proportion Notice," during construction, the "Ready-Mixed Concrete Factory Pouring Material Qualification Certificate," and after the concrete reaches the strength age, the supplier must provide the "Concrete Strength Test Report" and the "Ready-Mixed Concrete Factory Qualification Certificate."
f). Upon arrival at the site, check the slump of the concrete and observe for any signs of bleeding, segregation, or curing. Concrete that does not meet the requirements must not be used.
g). Each time concrete enters the construction site, its slump must be tested. Concrete with slump that does not meet design requirements must be removed from the site and not used.
h). The basic concrete is poured in two stages: the bottom plate and the annular wall. Construction joints are left at the junction of the annular wall and the bottom plate.
(6). Reinforcement Engineering Control
a). To ensure the aesthetic quality of the concrete, rebar and tie wire must not be exposed. Tie wire must be wrapped at least 2 times, with the loops and ends facing the interior side of the component's cross-section.
b). The concrete mortar blocks used for the lateral protective layer of rebars are prone to exposure after concrete pouring, affecting the appearance quality. It is required to use plastic blocks for the lateral protective layer, arranged in a plum blossom pattern. To prevent the displacement of the blocks causing exposed rebars, the blocks must be securely fastened.
c). Ensure the welding sections of the rebar are thoroughly cleaned, with a clean surface free of oil, impurities, and other contaminants.
d). Clearly mark the positions of embedded steel bars and inserts before construction for easy and precise location. After concrete work is completed, promptly remove the concrete from the surface of the embedded inserts, and strictly prohibit rough handling. Timely remove rust from the surface of the embedded inserts to prevent rust contamination of the concrete surface.
(7) Template Engineering Control
a). Wood molds should be made of multi-layer boards with a hard texture, smooth and flat surface, thick and even coating layer, good wear resistance, and sufficient stiffness, with a thickness of 18mm. The cutting of wood mold production must be accurate to ensure the precise geometric dimensions of the mold, tight joints, and properly stored according to specifications. The templates should be numbered.
b). The template surface must be cleaned thoroughly, with tight joints between panel sections and no misalignment. The joints of the template are sealed with double-sided tape, which should be retracted 1mm into the template surface and should not protrude.
c). Templates for the base and wall should be securely reinforced, without excessive expansion or deformation. After inspection by the supervisor and owner, the templates must be approved before concrete pouring can proceed.
d). Prior to concrete pouring, water the wooden molds in advance to keep the surface moist and well-soaked. Ensure that all debris inside the molds is thoroughly cleaned, maintaining cleanliness within the molds and preventing any water accumulation.
e). Do not remove formwork side molds prematurely; they should only be removed when the concrete strength reaches above 1.2 MPa (determination method: scratch the concrete surface with a fingernail without leaving any marks or conduct pressure tests on reserved test blocks). Take protective measures when removing formwork to prevent hard hammering or prying, which can cause damage to the concrete surface. After removing the formwork, promptly clean the concrete paste from the surface of the formwork to facilitate reuse.
(8) Concrete Pouring Control
Prior to pouring concrete, strictly inspect its slump, bleeding, and segregation. Any concrete that does not meet the standards must not be used.
b). When the concrete is officially poured into the mold, it should be poured symmetrically. The first pour should be around 500mm in height, with each mold being poured in three layers, each layer being around 500mm high.
c). Before using the vibration rod, check that all parts are intact, connections are secure, and the motor insulation is reliable.
d). The concrete vibration method uses the plum blossom pattern. During the operation, the vibration rod should naturally sink into the concrete without forceful insertion, and it should be inserted vertically with "quick insertion and slow withdrawal." The spacing between each insertion point of the vibration rod should be uniform, and the spacing should not exceed 1.5 times the effective working radius of the vibration rod. The distance from the formwork can be controlled at 100-150mm. The vibration direction of each layer of concrete should be consistent, and the vibration rod must enter the lower layer concrete by 50mm, and it should not be less than 50mm to ensure the bonding between the layers. The vibration time of the vibration rod in the concrete is about 40 seconds per insertion point, until the concrete no longer visibly sinks, no bubbles appear, and the surface emits cement paste. Pay special attention not to pull out the vibration rod immediately when reaching the surface layer of the concrete, and a second vibration can be used to reduce surface bubbles.
e). Avoid touching the vibration rod with steel bars, core pipes, and precast components during operation. Do not use the vibration rod to vibrate the steel bars to compact the concrete.
f). After concrete vibration is completed, immediately clean the surface laitence and compact it, controlling the elevation of the concrete surface.
(9) Concrete Curing Control
To minimize surface color variations in concrete, the surface should be compacted and smoothed. After the concrete surface dries, promptly cover it with plastic film and then place cotton blankets over the surface.
b). After template removal, do not spray water immediately. Cover the surface with a tight plastic film for maintenance, then cover it with straw mats or cotton blankets to keep the concrete moist at all times.
c). Concrete curing time follows the provisions of the "Code for Acceptance of Construction Quality of Concrete Structures."
(10) Earthfill
After the basic template is removed, inspect the concrete foundation, fill out the concealed acceptance record and foundation structure acceptance record, and backfill the foundation soil after passing the inspection. Clean the surface soil and other contaminants from the foundation before backfilling. The soil used should be free of turf, roots, and debris. Compact the backfill soil layer by layer, with each layer not exceeding 300mm in thickness. Use a compactor to compact each layer three to four times (adjust the number of compaction passes according to the actual site conditions). The backfill compaction coefficient must strictly comply with the design requirements in the drawings. The backfill soil should be slightly higher than the ground level to facilitate drainage and create a 3% drainage slope.