


详情描述
Section 1: Introduction to 3D Printing Models
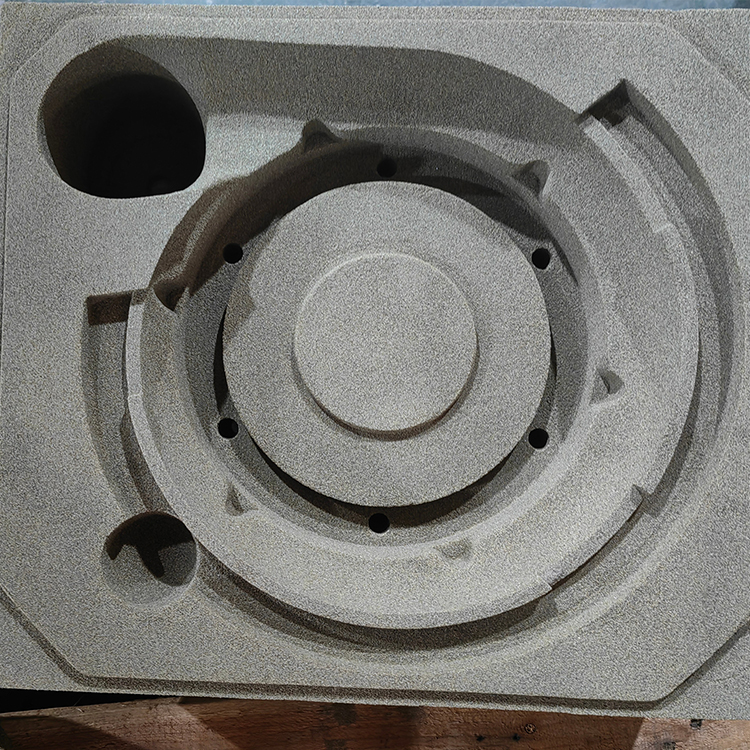
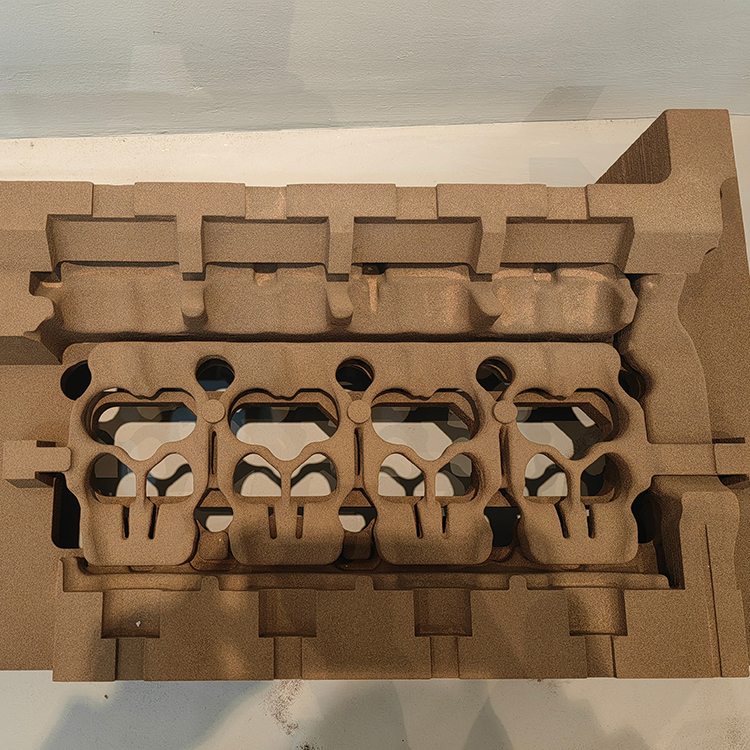
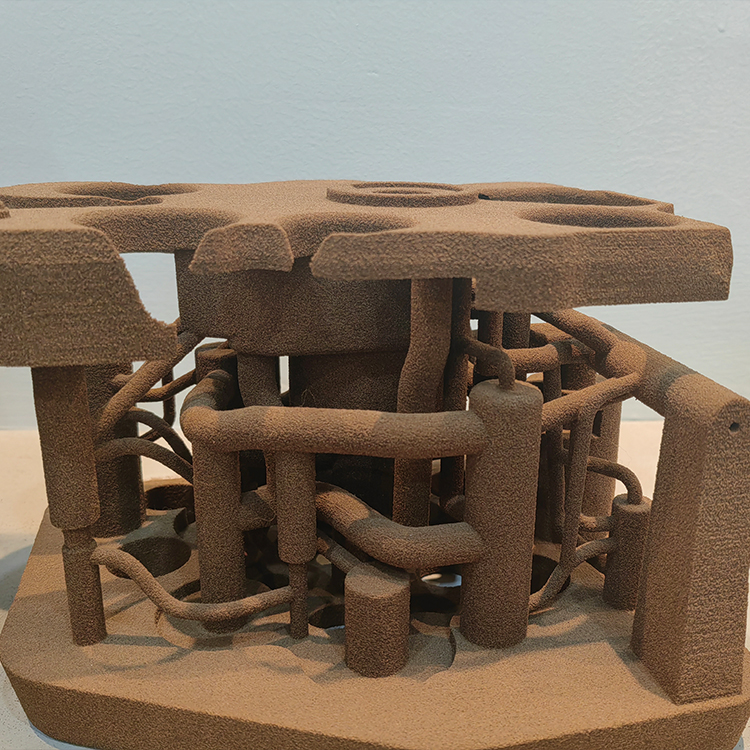
3D printed models are the physical manifestation of 3D digital designs, constructed by layer-by-layer accumulation of materials (such as plastic, resin, metal, etc.). The core is the STL file format, which divides the 3D model into countless triangular patches, guiding the printer to print layer by layer. The model typically includes the following structures:
- Primary Structure: The geometric shape of the model.
- Support Structure (Optional): Temporary支架 to prevent the collapse of suspended parts.
- Interface design: Such as threaded holes, clips, etc., for easy assembly or functional realization.
II. Key Parameter Explanation
- Layer Height
- Range: 0.05mm (high precision) to 0.3mm (fast printing)
- Impact: The lower the height, the smoother the surface, but the longer the printing time.
- Infill Density
- Scope: 10% (lightweight) ~ 99% (solid)
- Application: 20% fill for everyday models, over 50% for load-bearing components.
- Print Speed
- Range: 30mm/s (Fine) to 150mm/s (High Speed)
- Balance Point: Excessive speed can lead to layer misalignment or loss of detail.
- Temperature Control
- Nozzle Temperature: PLA (190-220℃), ABS (230-260℃)
- Hot Bed Temperature: PLA (50-60℃), ABS (100-110℃)
- Crucial: Insufficient temperature leads to warping; excessive temperature tends to clog the nozzle.
- Material Type
- PLA: Eco-friendly and easy to print, suitable for prototypes.
- ABS: Resists high temperatures; requires a sealed environment to prevent warping.
- Resin: High precision, for stereolithography (SLA/DLP) 3D printing.
- Nylon/TPU: Flexible material, suitable for mechanical parts.
- Support Structure
- Type: Tree Support (easy to remove), Linear Support (material saving).
- Optimized: Reduce the contact area of support to ease post-processing.
Section 3: Application Scenarios
- Prototype Design and Rapid Manufacturing
- Industrial: Iterative testing of auto parts and consumer electronics enclosures.
- Medical: Custom prosthetics, surgical guides.
- Education and Creativity
- School: 3D Modeling Instruction, Historical Relic Replication.
- Art: Sculptures, personalized jewelry customization.
- Consumer-grade applications
- Home Decor: lampshades, vases, and other decorative items.
- Toys: Anime figurines, assembly models.
- Industrial Manufacturing
- Aerospace: Lightweight parts printing.
- Construction: 3D printed concrete house structures.
Section 4: Instructions for Use
- Model Acquisition and Preparation
- Source: Downloaded from platforms like Thingiverse, Cults3D, or designed using Blender, Fusion 360.
- Fix: Check model errors (e.g., holes, non-manifold edges) using Netfabb or PrusaSlicer.
- Slice Software Settings
- Popular Software: Cura, PrusaSlicer, Simplify3D.
- Core Steps:
- Import STL File → Select Printer Model → Set Layer Height/Fill/Temp → Generate G-code.
- Printing Process
- Calibration: Level the heated bed, clean the nozzle.
- Monitor: Observe adhesion during first layer printing; add glue or adjust Z-axis offset as needed.
- Post-processing
- Remove Support: needle-nose pliers or cutting knife.
- Surface Treatment: Sandpaper grinding, painting, immersion (epoxy resin), or chemical polishing (for resins).
V. Common Questions and Solutions
- Model cracking or interlayer separation
- Reason: Insufficient temperature, excessive height, and rapid cooling.
- Solutions: Increase nozzle/bed temperature, reduce print speed, and enable the "Smaller Layer Time" feature.
- Supports that are difficult to remove
- Reason: Excessive contact surface between the support and the model.
- Solution: Adjust "Support Contact Depth" in the slicing software or use water-soluble support material (e.g., PVA).
- Surface texture is pronounced
- Reason: Excessive height or uneven extrusion.
- Solution: Reduce layer height, calibrate the extruder stepper motor (E-steps).
- Model warp
- Reason: Inconsistent hot bed temperature or material shrinkage.
- Solution: Enhance adhesion with vinyl or magnetic film, and add a brim or a tail raft.
- Material is not compatible with printer
- Reason: Nozzle diameter does not match wire diameter (e.g., using 1.75mm wire with a 0.4mm nozzle).
- Resolve: Confirm equipment specifications to avoid mixing different material wires.
Section 6: Summary
3D printed models, with their flexible parameter adjustments and broad range of applications, have become a core tool from personal creation to industrial manufacturing. Mastering model design, parameter optimization, and post-processing techniques can significantly enhance print success rates and product quality. When encountering issues, it's recommended to combine printer logs with slicing software preview functions for step-by-step troubleshooting. Accumulating experience will greatly improve efficiency.


