

- AllProduct Category
-
Conveying Equipment
Brush Sweeper
Distribution Equipment
Industrial Equipment
Hydration Bag
Wall Saws


Recommended Products
Wall Saws (Construction Site) - Concrete and Reinforced Steel Wall Cutting Machines

3kW Straight Electric Actuator, Hydraulic Cylinder, Coal Cutting Equipment Matching Hydraulic Push Rod
卸灰阀配套推杆 DYTP-700-400 Parallel Hydraulic Push Rod
Electrical Rugged Gate Valves, Electro-hydraulic Actuated Rugged Gate Valves, Various Diameter Ash Discharge Valves
DSZ-600 Electro-hydraulic Butterfly Gate, Discharging Equipment, Double-Leaf Electric Valve
Material Storage Gate, Electro-hydraulic Scissor Gate, Mine Electric Push Rod Discharge Valve
详情描述
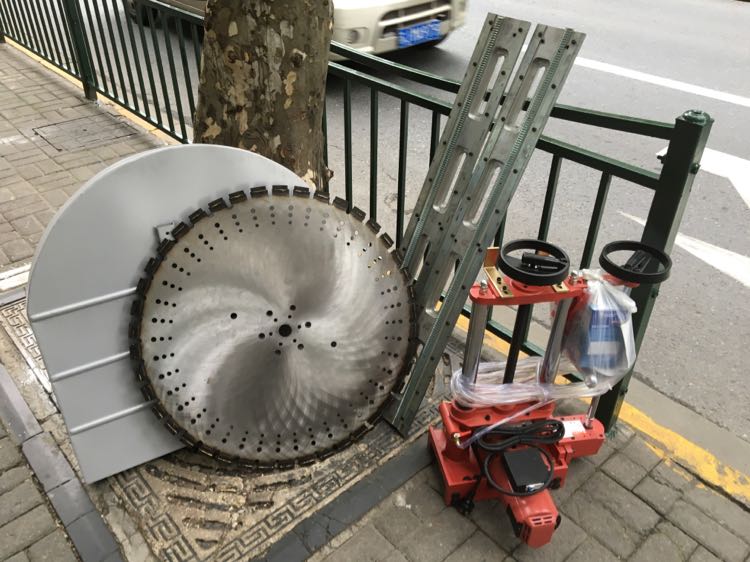
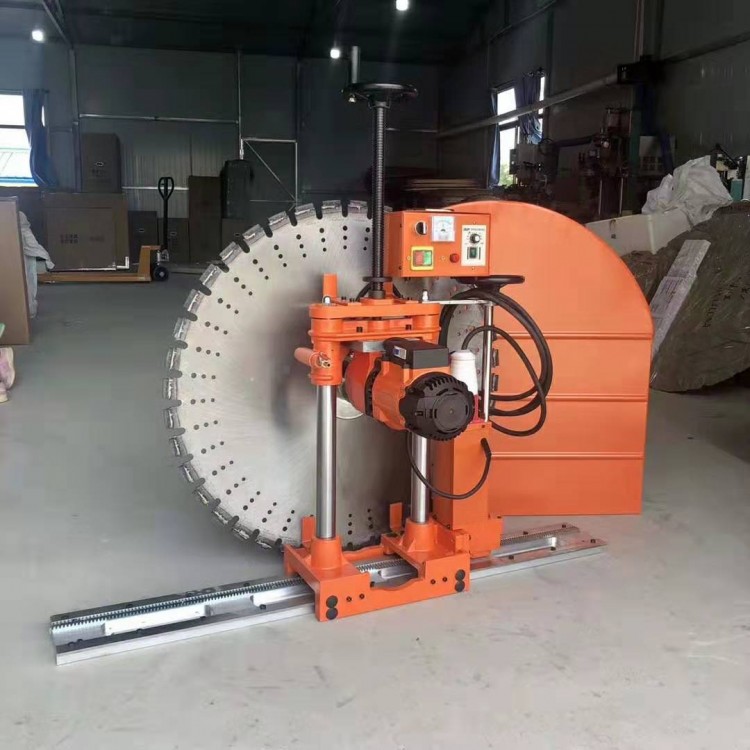
Wall Saws (Construction Site) - Concrete Wall Cutting Machines
Wall cutting machines are primarily used for building renovations, reinforcement, and design changes, capable of cutting large areas of walls such as door openings, windows, and elevator shafts. Manual feed and cutting. The structure remains unharmed, forming in one go, which not only avoids damaging the building structure from traditional hammering work but also saves considerable time and costs associated with drilling circular排孔 holes.
Key Technical Parameters:
Saw blade:800mm Cut Depth: 32cm
Power Voltage:220V, Power: 6200W
Dimensions:100*100*80cm
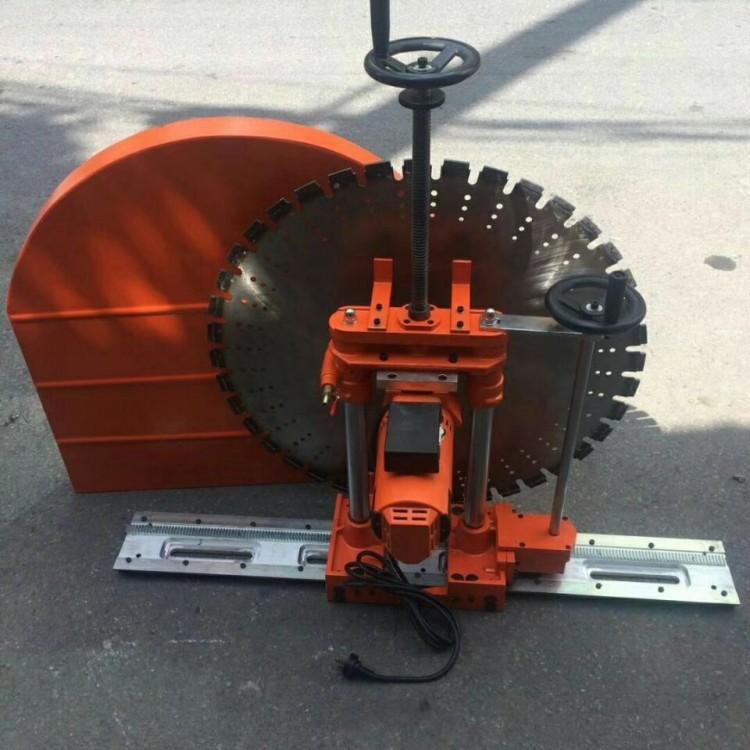
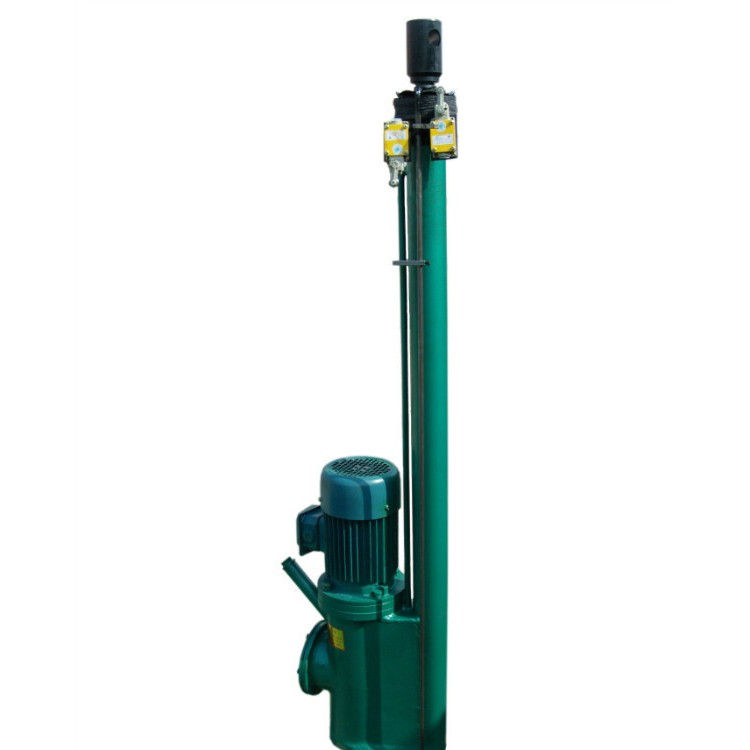
Product Real Photos Display
Wall cutting machine operation instructions:
Secure the track with expansion bolts, place the machine on the track (the track has teeth and the machine has gears, so it won't slide off; it can only be moved manually), install the saw blade and guard, then turn on water and electricity. Use both handwheels for operation; the middle handwheel controls the up and down movement of the saw blade, and the right handwheel controls the machine's movement along the track.
Our wall cutting machines feature heavy-duty dual insulation high-power motors and reducers, boasting low failure rates, long service life, and cost savings on maintenance. Mechanical clutch protector, effectively preventing damage to the machine and personnel due to incorrect operation. Equipped with manual or automatic cutting control, it not only improves construction quality but also accelerates the construction speed, while significantly reducing the labor intensity of the operator.
Machine Installation
First install the track, then place the machine on the track.To achieve horizontal wall cutting, the correct installation of the sliding track is: the motor should face up and the blade should face down. During cutting, the rotation of the blade should be as opposite to the motor's running direction as possible, which not only reduces the cutting time but also improves the cutting efficiency.
First, drill a hole with a hammer drill at a position approximately 165mm from the self-cutting edge, with a diameter of 16.3-16.5mm and a depth of 55mm for the expansion screw. This hole can only accommodate one M12 expansion screw included with the machine. The rail can be installed and used in any direction around the hole.
2. Clean out the small debris from the holes using an air gun.
3. Insert an M12 expansion screw provided with the machine, then tap the expansion screw into the hole with a mallet, and strike it with a hammer to secure the expansion screw. Ensure that the expansion bolts are securely fastened in the holes; otherwise, the machine may move or fall off during operation. Use the expansion bolts and screws, as well as the fixed guide rails provided with this machine, and determine the number of expansion bolts based on the softness of the cutting surface. Track Secure firmly.
4. When installing the main unit, align it according to the forward arrow on the unit, connect the speed controller next, followed by the power outlet, then turn the handwheel counterclockwise. The main unit will move along the track.
5. Insert the saw blade; the main body's inner hole is 35mm. Hex screws for securing the saw blade Open-end wrench Tighten.
6. Align the saw blade with the cutting line and guide the track. Adjust the horizontal movement of the six hexagonal head leveling screws on the track with a hex wrench to level the track, preventing the running track from derailing at the joint.