


- AllProduct Category
-
Construction Projects
High Filling Grouting
Grouting Construction
Curtain Grouting
Anti-Floating Anchor Bolt
Drilling Grouting
Compaction Grouting
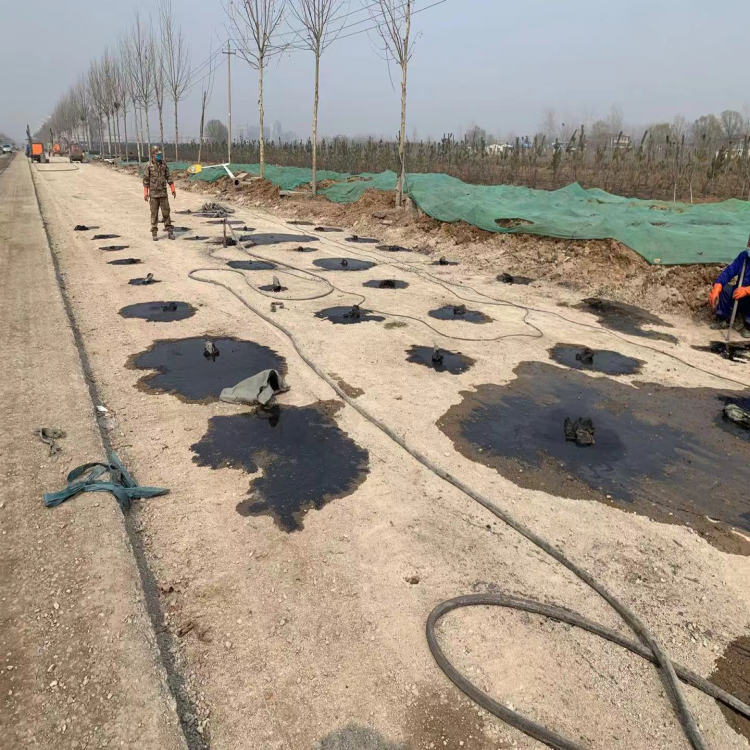
Subgrade Grouting
Road浆压


详情描述

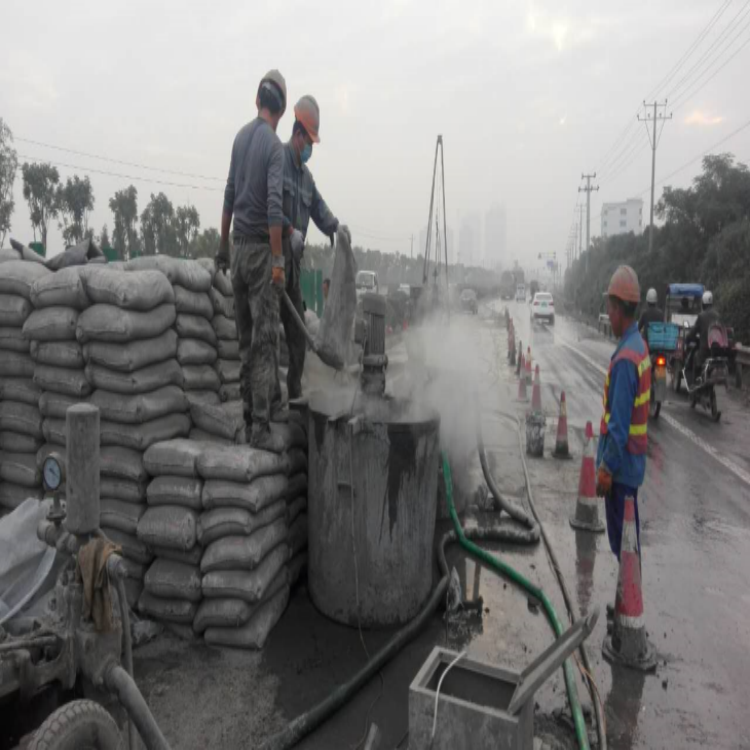
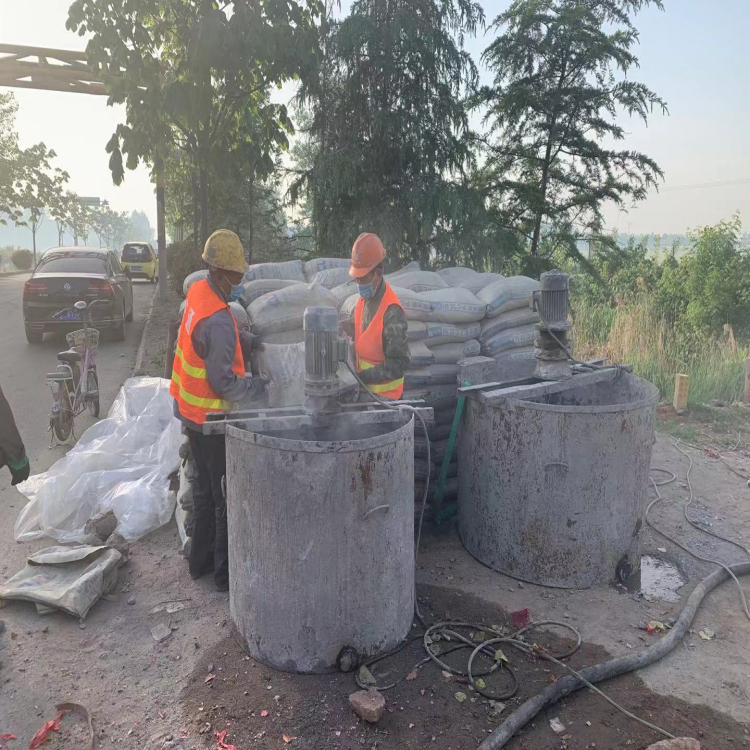
Construction
The subgrade for this project is primarily filled, with a total fill volume of 2,080 cubic meters. The fill material mainly originates from the sand and gravel along the Xiangqing Bridge construction site (Xiangjiang River). Since most of the route utilizes existing subgrade, the alignment requires less fill volume. Sand and gravel for subgrade filling can be directly extracted from the Xiangjiang River.
The road slurry construction crew, based on the engineering volume of the subgrade for this project, divides the subgrade construction into one construction area. Sand and gravel excavation is carried out with excavators, and transported by dump trucks. The filling is done in sections and layers, with bulldozers spreading and graders leveling, followed by vibratory rollers for compaction.
The construction period for this engineering subgrade is controlled within one week, with completion by December 28, 2004.
II. Construction Methods and Techniques
(1) Subgrade Excavation Construction Technique
Process flow diagram is shown in Figure "Frame Diagram of Roadbed Construction Technology."
Construction Preparation
(1) Construction Surveying and Staking
Before commencing road grouting construction, the team shall conduct a re-measurement of the route and elevation in accordance with relevant regulations, verify and add水准 points and control stakes, and measure and draw the cross-section of the route. The measurement results should be recorded and submitted to the supervisor engineer for review and signature approval.
(2) Construction of access roads
The construction access road is designed to minimize land occupation, making the best use of existing roads.
2. Base Treatment
The foundation for embankment construction is treated with methods and measures appropriate to the soil characteristics of the foundation, the natural state of the foundation ground, and the stability requirements of the foundation as specified in the design, along with the embankment fill height.
Prior to filling, clear the surface soil and tree roots within the base area as per regulations. Use a bulldozer to push the cultivated soil to designated locations for re-cultivation, and level and compact the base as required.
(2) Conduct base treatment construction according to design specifications for road embankments of different heights.
3. Compaction Process Test
Prior to embankment filling construction 28 days in advance, select an embankment section of not less than 50m (full width of the subgrade) based on different filling materials and compaction equipment for a rolling process trial. Based on this, determine the optimal process parameters, including the optimal moisture content of the filling material, the loose thickness of the filling material, the type of compaction equipment, the speed of travel, and the number of compaction passes. After approval by the supervising engineer, these will serve as control standards to guide similar construction and ensure the quality of subgrade filling.
4. Embankment Construction
Utilizing the "Four Zones, Eight Processes" construction method. The "Four Zones" involve dividing the work area into unloading, spreading, rolling, and inspection zones, ensuring clear boundaries for precise control over spreading thickness, flatness, moisture content, rolling range, and passes, preventing missed areas, and facilitating accurate density testing. The "Eight Processes" include material selection, subgrade treatment, spreading and leveling, moisture control, vibration rolling, inspection and approval, subgrade shaping, and slope grading. The entire embankment construction ensures reasonable zoning, clear processes, and guarantees the quality and density of the filled sections meet requirements. During construction, the process begins with a bulldozer for spreading, followed by manual leveling, and then roller compaction. For areas inaccessible to machinery, such as corners, bridge abutments, and behind them, manual labor and small machinery are used for spreading and compaction.
5. Roadbed Reconstruction
After filling to the designated elevation, level and measure the area. Restore the centerline, conduct horizontal measurements, set out the road shoulder stakes, construct the road crown, and roll it once with a roller compactor.
②The surface layer of the graded subgrade should not contain materials larger than 100mm in thickness within 150mm.
③Subgrade repair involves manually or mechanically removing excess fill soil from both sides of the subgrade to an off-site location.
④When repairing slopes requiring reinforcement, reserve reinforcement locations. If the fill soil is insufficient or the slope is eroded by rainwater to form small gullies, dig the original slope into steps and fill it layer by layer.
⑤When repairing the subgrade, clean all debris from the side ditches to ensure unobstructed drainage.
6. Structure Backfill
(1) Fill the gap at the bridge pier after the construction masonry reaches the allowable strength.
(2) Filling Range
The embankment length along the route direction is not less than the height of the abutment plus 2 meters at the top; at the bottom, it is not less than 2 meters from the inner edge of the foundation; the embankment length of the bridge abutment should not be less than 3 to 4 times the height of the abutment, with the embankment length on each side not less than twice the diameter length.
(3) Utilize machinery
Use large machinery for layered filling and vibration compaction 1 meter beyond the bridge abutment. Within 1m of the bridge abutment, employ impact compaction and layer-by-layer filling.
(4) Construction Materials
The filling materials must comply with the design and specifications.
(5) Filling Method
In backfill compaction operations, the backfill should be compacted symmetrically to maintain the integrity of the structure, with the thickness of each layer not exceeding 15 cm.
Section (II): Subgrade Borrowing Construction Technique
1. Excavation of earth embankment
The highway grouting construction team first clears the surface soil and weeds in the excavation area of the Xiangjiang River, then starts digging from the richer sand and gravel areas, layer by layer from top to bottom. The excavation is done using the horizontal digging method. It is necessary to survey the sand and gravel location of Xiangqing first, and then draft the construction plan. After obtaining the approval of the supervisor engineer early on, proceed with the construction. During the construction, pay attention to:
(1) The longitudinal slope at the bottom of the flat curve side trench connects with the trench bottom before and after the curve. No accumulation or overflow should occur on the inside of the curve.
(2) The side ditches at the subgrade junction should gently slope towards the natural ditches or drainage channels on both sides of the embankment to prevent erosion of the embankment.
(3) All drainage facilities must ensure stable embankment, regular channel shape, and smooth slope bottom to prevent damage to the subgrade. Excavated soil from the water-diversion ditches should be placed between the cut and the ditches, forming a soil platform. The water-diversion ditch on top of the platform should have a 2% transverse slope, and the distance from the foot of the soil platform's slope to the top of the cut should not be less than the specified design.
(3) Masonry retaining wall
This section's protective engineering requires 726.1 cubic meters of masonry materials. Our unit uses dense, uniformly textured, non-weathered, and crack-free hard stone. The compressive strength is no less than 30MPa, and larger stone pieces are preferably used for construction. The block stones are chosen to be roughly rectangular, with flat top and bottom surfaces, a thickness of not less than 0.2 meters, and widths and lengths approximately 1 to 1.5 and 1.5 to 3 times the thickness, respectively. When used as facing, they are slightly dressed from the exposed surface to the interior. The flagstones are selected with two roughly parallel faces, a thickness of not less than 0.15 meters, and widths and lengths at least 1.5 times the thickness. For facing purposes, larger stones with flat surfaces are chosen and slightly dressed.
(1) Concrete-block retaining wall
We construct the retaining wall with flagstones in the order of "first the corner stones, then the face stones, and finally the belly stones." We select rectangular, appropriately sized stones for the corner stones and slightly dress them. After setting the corner stones, we hang the line on them before building the face stones, leaving a gap for transporting belly stone material. We seal the gap after constructing the belly stones. The belly stones are built by stepping back from the direction of transporting stone material, starting from a distance and moving closer. The belly stones and face stones are neatly constructed in layers and with full mortar as per the regulations.
1. Prior to construction, remove loose rocks, debris, vegetation, and other obstructions from the slope and foundation. Use layered masonry during construction, with each layer being 70-120cm (about 3-4 layers) high. Roughly level the gaps between layers. The masonry should be perpendicular to the slope or form a horizontal plane, and expansion and settlement joints should be set at specified distances. Break and align the masonry at the joint locations, and carve the stone material on both sides of the joints. Install a waterproofing layer and a reverse filter layer behind the wall, and leave drainage holes in the wall as per regulations.
2. During the construction of the lowest layer at the base of the wall, lay the slabs with the large end facing downwards. Then, utilize the natural shape of the upper stones to interlock with the lower layer, ensuring a crisscross pattern and tight joints. When laying, first spread mortar on each slab, then place the stone, gently shake it left and right, and finally tap lightly with a hammer to compact the mortar beneath. When continuing to lay slabs on the side of the already constructed wall, in addition to the setting mortar, apply mortar on the sides of adjacent stones, and lay the slabs. Use hand pressure and gentle taps with a hammer to compact the mortar beneath and on the sides, scraping off any excess mortar for reuse. Try to stagger the joints between layers within the construction, as well as between layers, ensuring that the staggered distance is greater than 8 cm.
3. For long-term masonry construction, segmental and layered masonry is employed, but the height difference between two adjacent work sections should generally not exceed 1.2 meters from the previous layer. The segmentation should ideally be placed at settlement joints or expansion joints, with consistent horizontal joints across all segments.
4. When setting in-place paving stones, first estimate the required shape and size of the stones based on the jointing area, then select the stones. Do not use mortar for trial assembly; instead, remove any large, interfering corners with a sledgehammer, strike smaller ones with a hammer, and chip away at the bottom or projecting parts affecting upper joints. Afterward, spread mortar, flip the stones back, and use a small crowbar to align them, ensuring even gaps. For smaller stones, gently tap with a hammer; for larger ones, gently rub them back and forth with your hands to compact the mortar.
5. When setting the settlement expansion joints, adopt the staggered masonry method according to the designated position in the design, ensuring the adjacent sections of masonry have different heights. Create an exposed surface at the joint, hang the line for masonry, and achieve both straightness and flatness. During construction, control the vertical alignment of the joints, and ensure the masonry surfaces on both sides are smooth and not overlapping. Additionally, fill the joints with asphalt hemp fibers as per the design requirements to prevent water leakage from the masonry.
6. Avoid vibration of the lower bricks when laying the upper brick layers. After a break in the construction work, sweep and moisten the surface of the laid brick layers before resuming.
7. The exposed surface joints of the masonry are filled using the flat joint method. First, wet the masonry with water before filling the joints, following the order of "from top to bottom" to first fill horizontal joints and then vertical joints. When filling horizontal joints, use a long trowel to press mortar into the joints, sweeping from left to right as you fill. After completing a section, run the trowel from left to right through the joint to compact and flatten it, ensuring uniform depth. For vertical joints, use a short trowel to scoop up mortar on the board and then fill it into the vertical joints, packing and flattening it. Finally, sweep away the excess mortar with a broom.
(2) Key Points for Quality Control in Protective Construction Works
The material specifications and quality meet the required standards.
2. The mixture ratio of the砂浆 used conforms to the testing specifications.
3. Masonry is layered with staggered joints, ensuring the mortar is tightly packed and the inclusions are full and dense.


