
 通过中商114认证

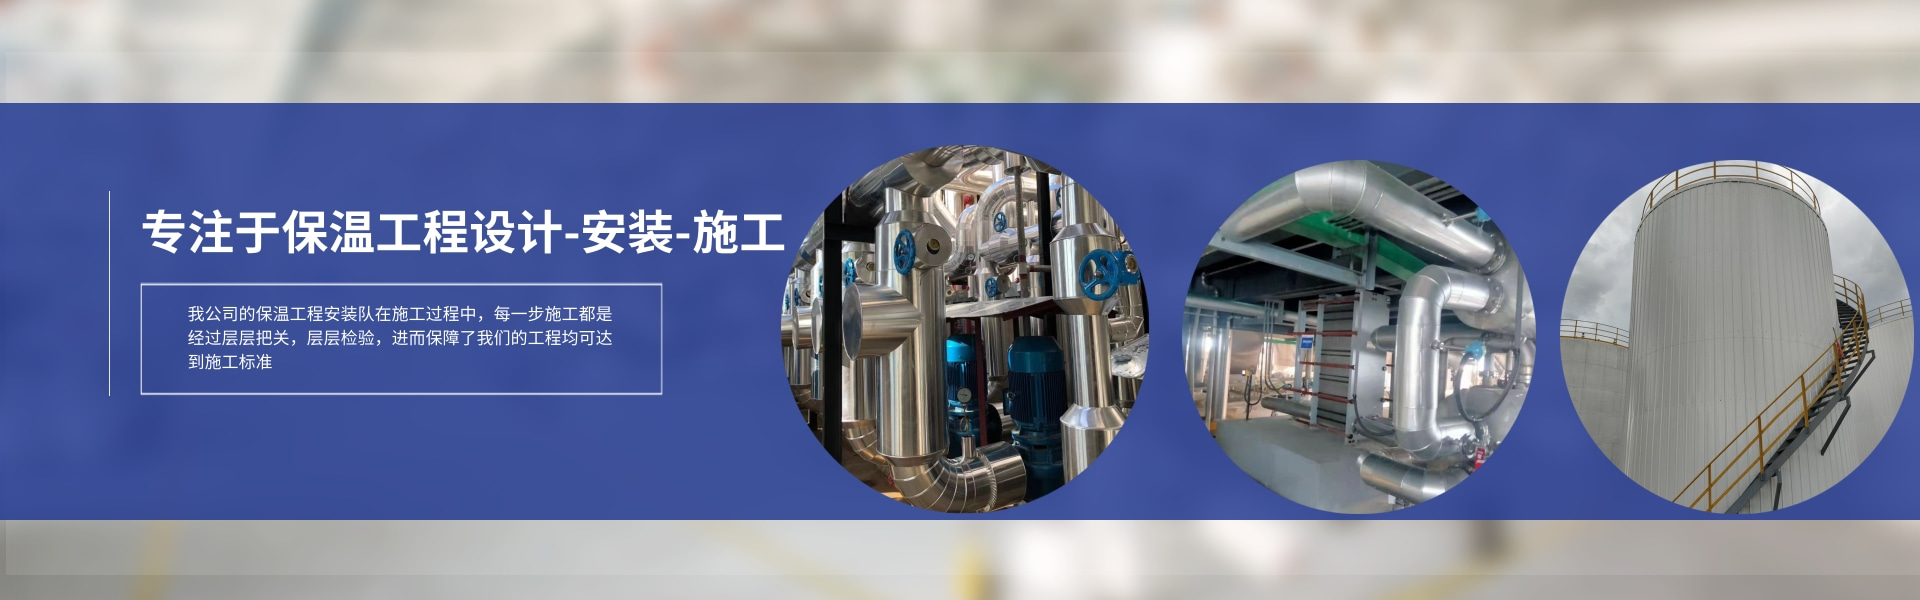
Why is pipe insulation necessary? Because the temperature of the fluid inside the pipeline is significantly different from the outside, which not only increases the heat loss of the system but also makes surface condensation more likely during the plum rain season, summer, and winter. Therefore, when selecting pipe insulation, it's crucial to carefully consider the performance of the insulation material to meet design and usage requirements.
Insulation of the piping system must wait for pressure testing, drain cleaning, and normal water circulation. All filter cores must be removed, cleaned, and reinstalled before proceeding. Typically, we use flame-retardant, high-porosity rubber and plastic insulation materials for pipe insulation, and seal the joints with adhesive. Insulation of vertical pipes must be combined with each layer of support to prevent the insulation sleeves from slipping and falling off. The outer surface of the on-site insulated pipes is made of a 0.5mm thick stainless steel sheet to form a metallic protective shell. During construction, care must be taken not to damage the heat preservation and moisture-proof layer.
Insulation Techniques:
Ensure the pipeline surface is thoroughly cleaned and dried.
2. Measure the length of the pipe section to be insulated, allowing for an additional 10mm.
3. Cut the pipe with a cutting knife and then slide the insulation sleeve onto the pipe.
Apply adhesive to the two cut surfaces of the insulated pipe.
5. Test the adhesive for curing by touching it with your fingers; there should be no sticky sensation upon contact with the coated surface.
6. Firmly press the adhesive interfaces at both ends of the pipe during sealing, and seal from the ends towards the center.
When connecting the two pipe ends, apply glue to both and gently press down.
Not only the pipeline, but also the valves on the pipeline require insulation measures. The first step in valve insulation is to measure the diameter, length, height, bolt exposure length, valve cover size, and dimensions of any special or irregular parts such as protrusions or bends.
Valve Insulation Physical Image
During the layout, the total length of the insulation should include the valve length, flange thickness, exposed bolt length, and the thickness of the insulation boards at both ends. The width is the layout length around the circumference of the flange on the valve body. The cover and other protruding parts should be considered for separate layouts. Circular, arched, or circular shapes should be laid out using a compass. First, use rubber and plastic filling to stick and fill in the concave part of the valve body, then apply the adhesive evenly on the valve body and filling. To prevent gaps from being loose or cracking, a 5mm thick and 30mm wide rubber and plastic strip can be glued at the joint to reinforce the seal.
Stainless Steel Insulated Shell for Sheets
Aluminum Insulated Shell Panel
Once the thermal insulation installation is completed, for quality pursuit and outdoor application of thermal insulation pipes, metal sheets (hot-dipped galvanized, aluminum, or stainless steel) with a thickness of not less than 0.5mm must be used to cover and protect the insulation surface. Fasten them with rivets at intervals of 50mm, and employ the "crabback bend" method for pipe turns, ensuring overlap with a raised ridge. The protective metal layer should appear smooth, shiny, and aesthetically pleasing.
